What to Expect During a Home Inspection
What to Expect During a Home Inspection
Did you know 40% of property purchases uncover hidden problems during evaluations? These discoveries often save buyers thousands in unexpected repairs. A thorough assessment by a certified professional is critical to understanding a property’s true condition.

Evaluations typically take two to four hours and cost between $296 and $424. Experts examine structural integrity, electrical systems, plumbing, and HVAC functionality. They also check for safety hazards like mold or faulty wiring.
This process isn’t just about spotting flaws—it’s about gaining clarity. A detailed report helps buyers negotiate repairs or adjust offers. Knowledge of a property’s strengths and weaknesses ensures informed decisions.
Key Takeaways
Professional evaluations last 2–4 hours and cost $296–$424 on average.
Certified experts assess structural, electrical, and mechanical systems.
Major safety concerns, like mold or wiring issues, are prioritized.
Reports provide leverage for negotiations or price adjustments.
Understanding a property’s condition reduces long-term financial risks.
Understanding the Home Inspection Process
Over 85% of property assessments cover 20+ critical systems, from foundation to ventilation. Certified specialists methodically analyze every component to identify potential risks or needed upgrades. This transparency helps stakeholders make confident decisions.
Overview of Evaluation Components
Professionals start by examining exterior features like roofing materials, siding condition, and drainage efficiency. Interior checks focus on functional systems:
Plumbing networks, including pipes and water heater performance
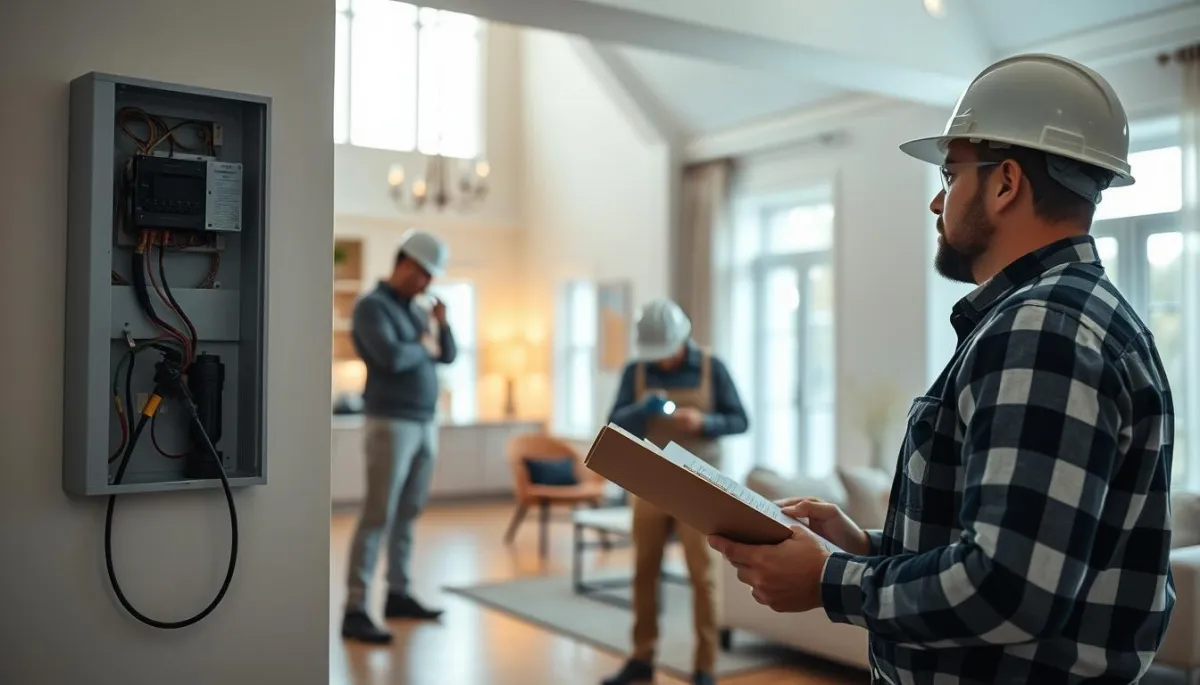
Electrical panels and wiring safety standards
HVAC efficiency and ductwork integrity
These inspections verify whether systems meet current building codes. For example, outdated water heaters or corroded plumbing often require immediate attention.
Timeframe and Typical Costs
Most evaluations take 2–4 hours, depending on property size. Costs average $300–$450 nationally, with higher fees for older homes needing detailed analysis. A skilled real estate agent can recommend trusted inspectors and clarify timelines.
Estate agents often coordinate scheduling to align with contract deadlines. They also help interpret technical reports, ensuring clients understand repair priorities or negotiation opportunities.
The Role of a Home Inspector and Real Estate Agent
Selecting the right professional can make or break your property assessment experience. Certified home inspectors bring specialized training that general contractors lack, ensuring no detail goes unnoticed. Your real estate agent often acts as a bridge, connecting you with vetted experts while explaining technical findings in plain terms.

Choosing a Qualified Home Inspector
Verify credentials through organizations like the American Society of Home Inspectors (ASHI). Members must pass rigorous exams and complete ongoing education. Always ask for sample reports to gauge thoroughness.
Online reviews reveal patterns in an inspector’s communication style and attention to detail. Look for phrases like “identified hidden issues” or “explained repairs clearly.” Avoid providers who rush assessments or skip hard-to-reach areas.
Agents streamline the process by recommending inspectors familiar with local building codes. They’ll coordinate schedules and highlight critical findings in reports. However, always double-check recommendations against independent reviews.
Certified home inspectors deliver reports that prioritize safety concerns and code violations. Their expertise often uncovers issues affecting property value or insurance eligibility. This clarity empowers smarter negotiations and long-term planning.
Home Buyer Inspection Guide: What Inspectors Look For
A property’s true condition often hides behind fresh paint and staged decor. Inspectors peel back these layers, scrutinizing structural elements and mechanical components to reveal risks or needed upgrades. Their findings empower buyers to make confident choices or renegotiate terms.
Interior and Exterior Evaluation
Professionals start outside, checking the roof for missing shingles, sagging areas, or water stains. They assess the house’s foundation for cracks and siding for rot or pest damage. Proper drainage systems and gutter functionality are also verified to prevent moisture buildup.
Inside, inspectors test electrical outlets, plumbing pressure, and HVAC performance. Outdated wiring or corroded pipes often signal urgent repairs. One inspector notes:
“Flickering lights or slow drains aren’t just annoyances—they’re red flags for deeper system failures.”
Common Issues and Deal-Breakers
Mold growth in basements or attics frequently points to unresolved leaks or poor ventilation. Left unchecked, it can weaken wooden supports and trigger health issues. Other critical concerns include:
Faulty electrical panels posing fire risks
Crumbling chimney structures
Septic tank failures
These discoveries may lead sellers to fix problems or lower prices. Severe structural flaws or hazardous system defects often become non-negotiable deal-breakers, protecting buyers from costly surprises.
Preparing for Your Home Inspection
A well-organized approach ensures nothing slips through the cracks during property evaluations. Start by creating a home inspection checklist that covers both visible features and hidden systems. This proactive step helps spot potential problems early and streamlines communication with professionals.

Pre-Inspection Checklist and Tips
Focus on the exterior first: check for cracked siding, uneven walkways, or clogged gutters. Inside, test all doors for smooth operation and inspect window seals for drafts. Pay special attention to the HVAC system—replace filters and note unusual noises during operation.
Don’t ignore air quality concerns. Musty odors often signal mold in crawl spaces or ventilation issues. Bring a flashlight to examine attic insulation and basement foundations. Document findings with photos to discuss later.
Key Questions to Ask During the Inspection
“Are the electrical panels up to current safety standards?”
“How old is the water heater, and are there signs of corrosion?”
“Does the roof show evidence of past leaks or repairs?”
Request clarification on any red flags in the report. For example, ask: “What immediate problems need addressing?” or “Which HVAC components may require replacement within five years?” Clear answers help prioritize repairs and budget accurately.
Specialized Inspections Beyond the General Review
Standard property evaluations often miss hidden risks lurking in specialized systems. Targeted assessments focus on critical areas like septic infrastructure, heating efficiency, and structural weaknesses within walls. These checks provide actionable insights for addressing safety concerns and long-term maintenance needs.
Evaluating Roof, Chimney, and Electrical Systems
Certified inspectors use advanced tools to assess hard-to-see areas. Thermal imaging detects moisture behind walls, while drone surveys reveal roof damage invisible from ground level. Flaking paint around windows often signals water intrusion or poor ventilation.
Electrical evaluations test outdated wiring and overloaded circuits. One expert notes:
“Many properties have DIY electrical ‘fixes’ that violate current safety codes—these pose serious fire hazards.”
Chimney inspections check for creosote buildup and crumbling mortar, issues a general review might overlook.
Considering Mold, Termites, and Radon Testing
Musty odors or warped walls often warrant mold assessments. Professionals sample air quality and test surfaces for toxic spores. Termite inspections become crucial in regions with high pest activity—look for hollow-sounding wood or mud tubes near foundations.
Septic system reviews analyze tank capacity and drainage field functionality. Radon tests are recommended in areas with uranium-rich soil, as this gas can accumulate in basements. Schedule these specialized checks if the property has older heating systems or visible cracks around windows and door frames.
Investing in tailored evaluations ensures no stone goes unturned. From verifying septic compliance to assessing energy-efficient heating upgrades, these steps transform uncertainty into informed action.
Interpreting the Home Inspection Report
Decoding a property evaluation report transforms raw data into actionable insights. This document details the condition of structural elements, mechanical systems, and safety hazards. Focus first on sections marked "immediate concerns"—these often involve water intrusion or electrical risks requiring urgent attention.

Identifying Major Red Flags
Excessive moisture stains or mold growth signal unresolved water damage. These issues can weaken foundations and attract pests if ignored. Inspectors often flag outdated plumbing or HVAC systems nearing failure—repairs here may cost thousands if deferred.
One professional advises:
“A cracked heat exchanger in a furnace isn’t just inefficient—it’s a carbon monoxide risk. Prioritize health and safety fixes first.”
Review cost estimates for major repairs carefully. Negotiate with sellers to address critical problems before finalizing the purchase.
Understanding Your Next Steps
Use the report to request seller concessions, like price reductions or repair credits. For example, a corroded roof might justify a $5,000 adjustment. If the estate has multiple issues, consider phased repairs—tackle urgent fixes immediately and schedule others post-move-in.
Ask inspectors clarifying questions: “How soon must this electrical panel be replaced?” or “Is this foundation crack actively worsening?” Their answers help gauge timelines and budget needs accurately.
Cost Implications and Repair Considerations
Navigating repair costs after a property evaluation requires strategic planning. Data shows 63% of owners face unexpected expenses within the first year, with repairs averaging $2,500–$7,000 nationwide. Addressing critical issues early prevents minor problems from escalating into budget-busting emergencies.

Budgeting for Repairs and Future Upgrades
Start by separating urgent fixes from desirable upgrades. Sagging floors or blocked drainage systems often demand immediate action to prevent structural damage. Malfunctioning heater units might require full replacements if repairs exceed 50% of the unit’s value.
Evaluate energy efficiency improvements like attic insulation upgrades. These projects typically pay for themselves through lower utility bills within 3–5 years. Outdated appliances also impact long-term costs—modern ENERGY STAR models use 15% less power on average.
Prioritize repairs that protect property value. For example:
Fix roof leaks before addressing cosmetic issues
Replace corroded pipes over updating light fixtures
Seal foundation cracks prior to landscaping projects
One contractor advises:
“Allocate 20% of your renovation budget for unforeseen issues—hidden water damage or faulty wiring often surface during repairs.”
This buffer helps manage surprises without derailing financial plans.
Conclusion
Understanding a property’s true condition requires more than a quick walkthrough. Comprehensive evaluations uncover hidden risks, from outdated wiring to compromised foundations. Each step in this process—assessing systems, reviewing reports, and planning repairs—equips you to protect your investment confidently.
Never underestimate overlooked spaces like the attic. Poor insulation or pest damage here can impact energy costs and structural stability. Environmental factors like carbon monoxide risks also demand attention, as faulty heating systems may expose occupants to silent dangers.
After receiving your report, prioritize safety fixes first. Consult specialists for complex issues and negotiate solutions that align with your budget. Use these insights to create a tailored maintenance plan addressing immediate needs and future upgrades.
This guide serves as your roadmap for navigating real estate transactions wisely. By applying its strategies, you’ll secure not just a property, but peace of mind for years to come.
FAQ
What systems are evaluated during a property assessment?
Inspectors review HVAC, plumbing, electrical, and structural components. They also check appliances, roofing, drainage, and foundation integrity to identify safety risks or code violations.
How much does a standard evaluation typically cost?
Fees range from $300–$500 depending on property size and location. Older houses or those requiring specialized tests (e.g., radon) may incur higher expenses.
Should I hire a certified professional for the review?
Yes. Look for credentials like InterNACHI or ASHI certification. Experienced inspectors provide detailed reports and can spot subtle issues untrained eyes might miss.
What exterior flaws could jeopardize a sale?
Cracked foundations, faulty roofing, poor grading, or rotting siding often raise concerns. Persistent water intrusion or pest damage may also deter buyers.
How should I prepare my house before the appointment?
Clear access to attics, crawl spaces, and utility areas. Replace burnt-out bulbs, test smoke detectors, and address minor leaks to streamline the process.
When are chimney or septic tank inspections necessary?
These are recommended for older properties, homes with wood-burning systems, or rural areas without municipal sewage connections. Specialists assess wear, blockages, or contamination risks.
What major issues appear in inspection reports?
Severe electrical hazards, active mold growth, or compromised load-bearing walls often require immediate attention. Outdated aluminum wiring or asbestos materials may also need remediation.
Can sellers negotiate repair costs post-inspection?
Yes. Buyers may request credits, price reductions, or seller-funded fixes for significant problems. Minor defects, like cosmetic wear, typically remain the buyer’s responsibility.
